Monday, April 2, 2012

Button Monogram

My inspiration, thanks to PINTEREST via here

I was excited about this because my 3 favorite craft loves are buttons, yarn, and felt, AND this has to do with buttons. :)

So STEP 1, get lots of colorful buttons. I think I got mine from Porters. They have a big bulk bin.

Buy a canvas, then trace the letter of your choice onto the canvas. I cut out a letter from word to help me trace. 

I would lay out the buttons your letter first then start gluing. I used a glue gun to glue my buttons on. (I did this with my cousin that is 9. I let her use craft glue and it worked just as well... it might even be better because when you are doing it, it's less permanent and it dries just as permanent as the glue gun. Make sense? 
 Then voila.... here is the finished product below! I LOVE it!


This picture isn't the prettiest, but this make-shift collage will soon someday go above H's crib.

Go get your buttons and start creating!!! 

PS... Instead of using a canvas, you could use a wooden letter from Joann or a paper mache letter from Joann also.


Monday, April 11, 2011

Lucky day...

I won!!!!


Check out Meggie's Love here

or

HERE

Thank you Megan! I can't wait to flaunt it.

Also, my sis is having a BABY boy today!!!

Can you believe it? Lucky, lucky day!


Wednesday, March 9, 2011

to do.

Here is a long and collected list of things I WILL do during the summer break. Stay tuned for man creations to come. I apologize in advance of not giving credit to those that deserve these darling ideas. That's probably the Taboo of blogging... ugh, SORRY! If I figure it out whose these are or if you know, let me know. I will update... For now, enjoy and be inspired.


Earring Holder


Isn't this a darling idea. I want to do something crazy funky downstairs in our basement... maybe paint the beadboard green... We'll see...


Ruffle Tablecloth, how cute it would be for summer!


Find this at DesignSponge. I want to do this to my side sidewalk.


Christmas Advent Calendar


Doesn't the sewn on E add a little flare to her hoodie..


I have made up my own Family Rules.... I just now need to do it. Check out Tatortots & Jello


I'm dying to find cute letters A&C to put above our bed.


Sunday, January 23, 2011


Kylie from Flybird Photography snapped this great shot. Isn't it a great shot and a creative way to get her name out there. She mailed a post card to muah with this... Thank you Miss K!

Check her out here

and here.

Enjoy!

Memo Board


This first picture is a before... it's the picture I had to scrounge up from my collection of photos. I forgot to take a Before picture, but you get the gist right?

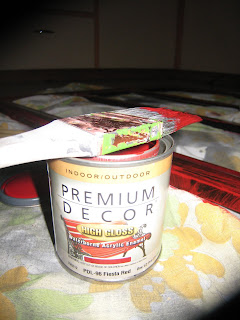
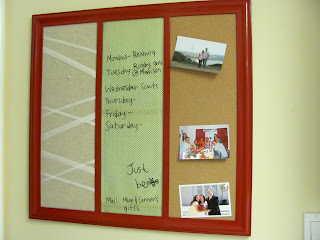
Cody's mom bought me this for Christmas a couple years ago. I love it, but wanted to switch it up a bit, give our kitchen more color. So I bought myself a can of $4 paint and crafted away!


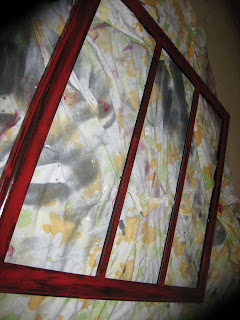
Now, if I were you. I would figure out how you can paint cheap wood. I want to call it fake wood, but I don't know if that's right. I painted probably 8 layers onto this frame, okay maybe 5, but it felt like alot. Every brush stroke, it would come off a bit, so you had to brush it and leave it to dry.

Below is after 3 layers...


2 more layers left, and ta-da! It's darling right! I'm so excited!! For the middle part, I put cute green gingham paper behind the glass, then bought a chalk pen to write on top of it.


Whenever Cody & I find something older to buy, the classic Avrey line is, "Let's buy it and paint it!"

He thinks I'm a joke, but isn't way more ME now and more funky fuN!?

Sunday, December 19, 2010

Homemade Crayons How To


1st, get a bucket of old crayons.
Thank you little 8 year olds for thinking that old crayons need to be rid of.

2nd, start peeling the crayons. Don't peel them when they are dry. It wasn't until after Jenna, Anna, and I had peeled 40 or so that I thought of a brilliant idea. Put the crayons in a bowl of warm water for 5 - 10 minutes, then try to peel. They come off much easier.

3rd, make a double boiler with a pot and tin can. Only put about an inch of water in the pot with the temperature on medium. Watch your crayons start to melt. Stir occasionally.

For the color, if you want a certain color, put the bulk of that crayon in when melting. For the green crayons, I did a mix of greens and blues. Like paint if you put black in and you want yellow, you probably won't get yellow. Makes sense right?

I thought it would be fun to do multi color, but it didn't work out. If you know how to do so, let a girl know.
4th, pour the melted crayons into a silicone mold or you can use a chocolate mold. Place in freezer (or outside if it is cold enough) for 5-10 minutes or until hardened.

Make sure it is hard enough. If it's too soft, the crayons will break apart when you take them out of the mold.
Ta-da, there's the finished product.

These are perfect for a Christmas gift for your little ones. In fact, I'm going to give these to my sweet Grade 2 kids.